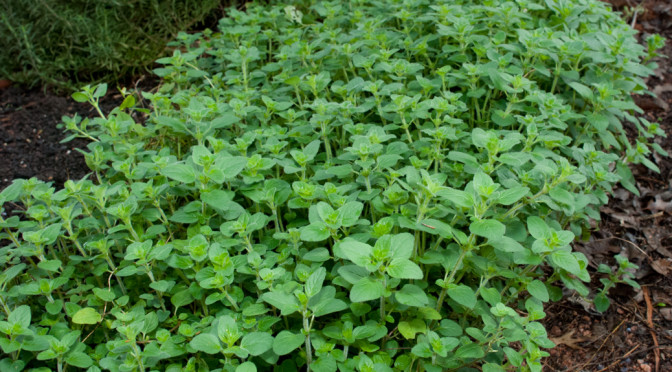
Spring is heavy growth season for most herbs and oregano is no different. Normally, oregano can be ignored for the most part, but I usually like to fertilize them during this growth period to get more clippings. I use my normal recipe of 1 tablespoon of fish emulsion, 1 tablespoon of liquid kelp, to 1 gallon of rain water.
When your oregano reaches about 8″ – 10″ in height, I usually trim it back half way. Remember that pruning herbs causes healthy growth and prevents it blooming too soon. I’ve always found that herbs lose a bit of their “zing” after they bloom.
If you do not plan to use your trimmings right away, you can hang them to dry. I generally bundle about 10 or so sprigs together at the base of where they were trimmed, then tie them together with a piece of culinary string. Then, I hang it with the stem bases up in my garage and just leave it there until I need some dried oregano after season is over and the main plants have died down or gone dormant.
Down here in central Texas, I can usually trim, use and/or dry until well into November or December and I have plenty left in the garage by the time spring time rolls around again. I won’t ever run out!
First, I must apologize for not posting in such a long time. I was job searching for a bit, found a new job and have been pretty busy. Not too busy to get my garden ready for the new year, but too busy to post about it.
As my last post recommended, I actually did get my garlic in the ground and have quite a crop going, along with several varieties of shallots.
If you live in central Texas, as do I, you will have certainly noticed that the temperatures have started to rise and we are well into the high 70’s and low 80’s almost every day now. This is perfect gardening weather, in my opinion.
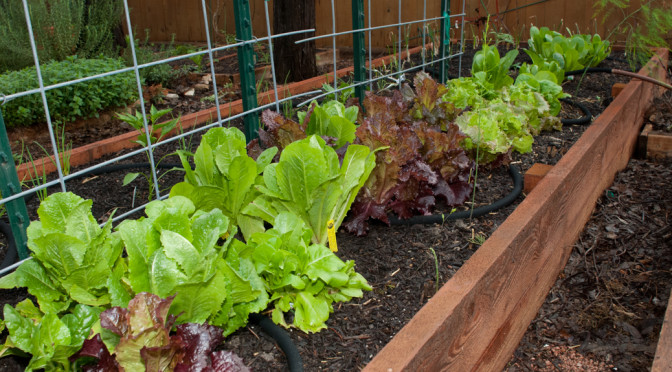
The reason for my post is because of these temperature changes, the hotter weather is just around the corner, so we are on the tail end of being able to harvest lettuce before it starts bolting. Needless to say, I’m recommending that you take advantage of any remaining lettuce plants you have, make sure to fertilize and water them now so you can get a few more takes from them.
Don’t forget, make sammiches (with plenty of lettuce) and salads, or… just eat some plain ol’ lettuce leaves!
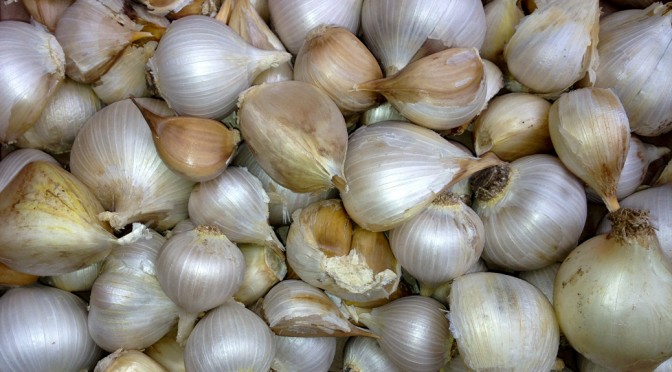
Well, it’s that time of year again, and it came so quickly this time! Wasn’t it just yesterday when I was digging my year’s garlic harvest out of the ground and hanging it to cure?
Anyhow, for those of you who grow your own garlic, I hope you ordered early in the year as many of the good suppliers are sold out at this point. You will still be able to purchase garlic seed at a local hardware store, but it won’t be the same as buying from Fillaree or Territorial Seed.
The first couple of weekends in October will be the optimal time for planting garlic so get your gardens prepared now so you aren’t scrambling at the last minute. Remember that garlic bulbs need to be fed during their growth periods prior to the winter freezes (if you get those) and also need plenty of water as well. Don’t over water, but definitely do not let the soil dry out either. The better you treat your garlic bulbs early on, the bigger and stronger the bulbs will grow!
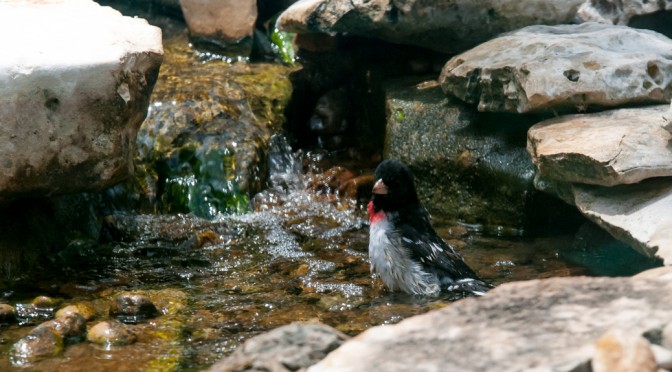
As my wife and I were getting lunch today, this beauty was noticed taking a bath in our water garden. So, I grabbed my camera and snapped this photo quickly before it flew away.
We had not seen this type of bird before, so I looked it up online and found that it was a rose-breasted grosbeak, a songbird that typically spends its summers in the north-central and north-eastern U.S.A. and Canada, and it’s winters in Yucatan and north-western South America. We live in its migratory path and how fortunate we were to catch this very pretty bird.
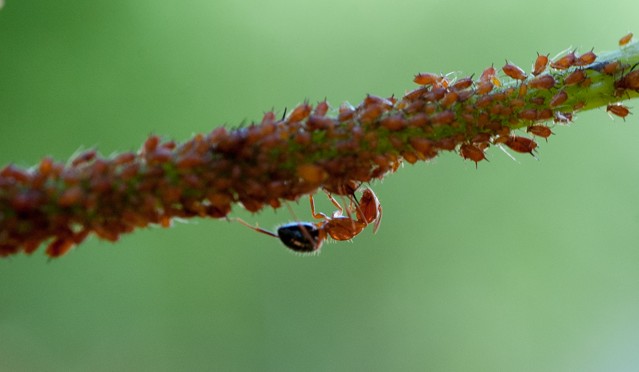
If you’ve done any gardening at all, you have encountered aphids on your plants, whether it be roses, peppers, various herbs or tomatoes. One thing you may not observed is an aphid “farm” being tended to by ants. Believe it or not, ants will herd aphids like cattle and milk them.
Why do they do this? Well, quite simply, it’s because it’s easy, the aphids are available, and ants have built-in mechanisms to make the aphids docile. The sugar from the host plants provide food for the aphids and because of the low nutritional value of the plant sap, aphids consume quite a bit of it, producing a lot of waste in the form of a secretion called honeydew. Ants like sugar and so the two are a perfect match.
You can do several things to rid your plants of aphids:
Wipe them off with your hand
Spraying insecticidal soap on the affected leaves and stems
Spraying garlic oil on the affected leaves and stems
Here in Texas the weather is starting to warm up, despite the strange winter we have received this year. Today was especially crazy with the low overnight at our house being 34 degrees and the high this afternoon being 78 degrees. CRAZY!
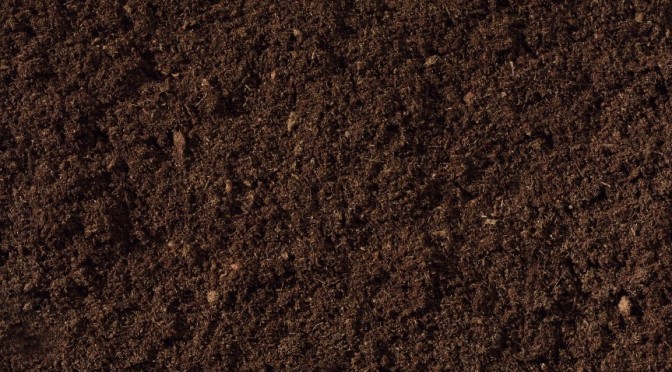
Being an advocate of using compost as an alternative to chemical fertilizers, I like to start early, preparing my beds for spring planting. Not only does compost keep our organic waste out of the garbage landfills, but it provides many nutrients for plants, which help keep them healthy. As we know, plant disease and insect infestation are generally caused by plants which are low in essential nutrients. Insect infestations of unhealthy plants are nature’s way of ensuring only the healthiest of plants perpetuate the species.
If you must buy compost, please ensure that you are purchasing certified organic compost. Introducing chemically-laden compost into your organic garden dis counterproductive. Now is a good time to get a good layer of additional compost in your garden beds. I know that many people practice hand tilling their soil to get newly-laid compost into the ground, but I prefer to let nature work for me. Layering compost on top of your mature beds and allowing worms, microbes and other soil inhabitants to mix up the ground is my preferred method. In my opinion, tilling merely disturbs the microbes in your soil and we don’t want to do that.
Now that winter is underway here in Texas, I thought I would take some time to write about garden bed preparation for the winter sleep and rejuvenation.
If your area is anything like ours, by the time the temperatures started south, you already had an abundance of the perfect material to work into and cover your beds… leaves. In Texas, we have a type of tree called a “live oak,” which is an evergreen and an “ever-shedder.” This tree drops leaves periodically throughout the year. If you are diligent with your leave cleanup, you should be stockpiling leaves for winter prep. Here is a nice write-up on live oaks: Live Oak Trees
I am fortunate enough to have several types of trees on property and mulching leaf blower/vacuum, so I am able to create a good amount of organic material for my garden beds. In addition, I have a good friend with three horses who lets me clean up her stalls and bring ample amounts of manure home. Remember, organic matter is essential for building good soil over time. It replenishes nutrients in the soil, helps with microbial beings, and provides good loose composition, which is essential for plant growth.
It is not recommended that you mix leaves into your soil. Decomposition of leaves uses nitrogen, which is one of the nutrients you are trying to replenish while the soil is sleeping over the winter. I am mixing a small amount of leaves into my soil (because I have a heavy clay base), but I am also added a significant amount of manure and compost as well.
When thinking about building soil, think about what happens in nature. On the forest floor, leaves, branches and other organic items sit on top of the soil. As time passes, the bottom layer decomposes, essentially creating new topsoil material. This is the same method you really want to use in winterizing your soil, except you are going to have to replenish the nutrients much faster, since in the south, there is a much shorter winter season.
Once you’ve mixed in the nutrients into your soil, you’ll want to provide a good cover which will shield good bugs, worms and microbes from the winter cold, while at the same time decompose and provide more organic matter. Leaves are the perfect solution and I recommend an initial layer of four inches of leaves at the onset of cold weather. Wet that layer down significantly and allow it to set and shrink over the next three weeks. Add another layer of leaves and rinse and repeat this process until late February.
By the time planting season starts up in late March (or so), your soil will be in great shape!
Raised bed gardens are gaining momentum with urban gardeners everywhere because of the advantages they bring. I began building raised beds for my garden two years ago and started with 6″ depths. After the first two growing seasons, I realized I would have to increase that depth, simply because of the soil composition here in south central Texas.
For those of you curious about the advantages of raised bed gardens, here are a few:
Good drainage – excess moisture is pulled away very efficiently.
Raised bed gardens have less issue with soil compaction. Since raised beds are generally built so plants can be accessed without stepping on the soil, compaction is virtually eliminated. Roots need air and soil compaction hinders this.
Seeds can be planted closer together. Because of the reduced soil compaction, more plants can occupy the same area.
Raised bed garden soil warms up quicker during the spring, enabling earlier planting.
Raised bed gardens are pleasing to they eye because they can be built and arranged to create pathways and sitting areas.
Soil health can be more closely monitored and controlled. You can customize your soil composition based on raised bed, thereby creating optimized environments for each plant family or preference.
This year, I have made a goal for myself to eliminate as much of my back yard as possible. Why? Well, because I live in central Texas, and I would rather create a drought-resistant environment and water my food and the area wildlife, instead of a lawn.
So, we have put in a water garden, not only to create a pleasant place for us, but to create a nice habitat for birds and other creatures. They need water too! We are also filling up what is left of my back yard with plants and flowers which provide leaves for butterfly worms to eat and pupate upon and to provide seeds naturally for the birds which frequent our place. (We have bird feeders as well, but want to supplement them.)
Recently, I decided to change up how my raised beds would be constructed, starting with two new beds which would collectively eliminate approximately 180 square feet of lawn and provide 64 square feet of new garden space at a depth of 10″. I always try to leave space for wheelbarrows and such as I do a lot of hauling around my beds, continually trying to improve the soil quality.
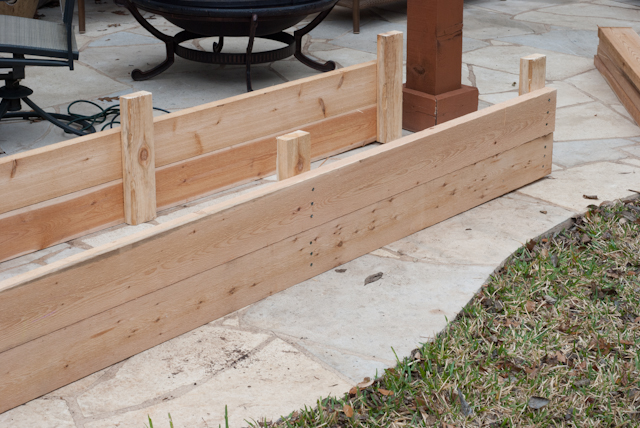
This time, I used four 2″x6″x12′ rough cedar planks and an 8′ cedar 2″x4″. Each 12′ plank was cut into 8′ and 4′ sections, while the 2″x4″ was cut into six 16″ sections. When finished, there were 4″ posts jutting from the bottom of the raised bed frame, used for holding the bed in place.
I used 3 1/2″ decking screws to attach two 8′ sections to three 16″ posts – even on one side and keeping the second plank section flush with the first. (See below)
Raised Bed Side Panels
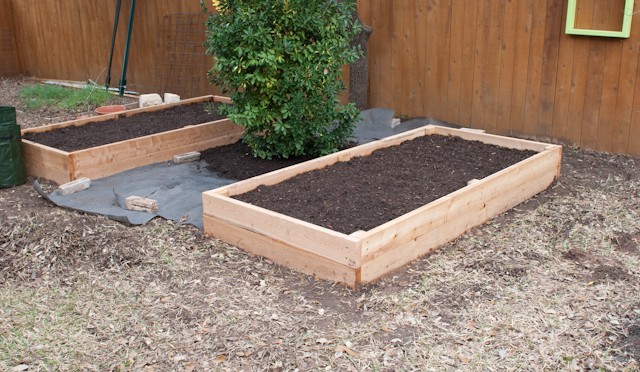
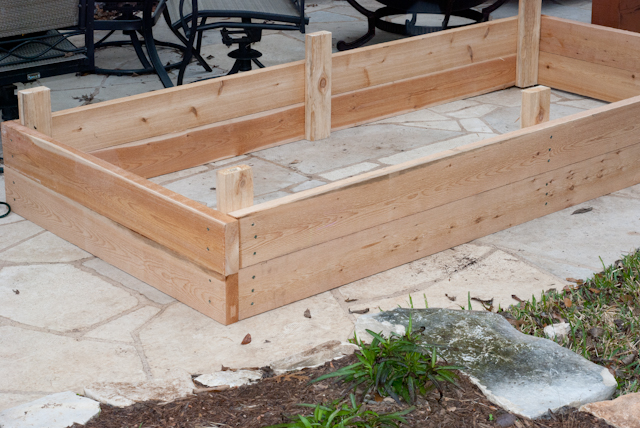
Once both 8′ sides were completed, I attached the 4′ sections to the ends, creating a nice rectangular box. It’s far easier to assembling these pieces with the frame upside down, allowing the tops to be flush. Here is the newly constructed bed.
Raised Bed Construction Complete
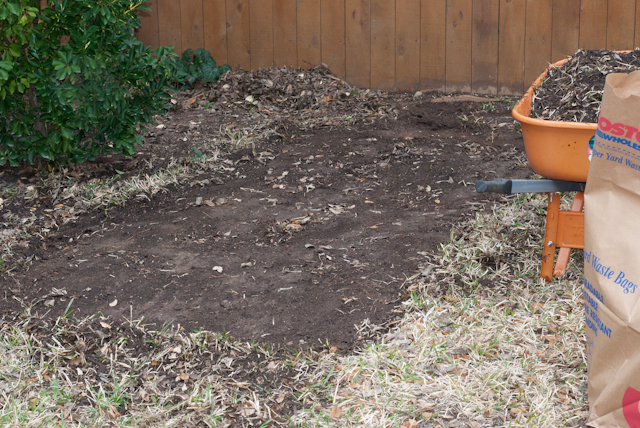
I had moistened the area of the yard I was going to clear and scraped all the sod away from the sections I was going to use as beds. Also, I always keep any sod I scrape up and then use my home-made compost sifter to separate good soil from the grass runners and roots.
Raised Bed Garden Base
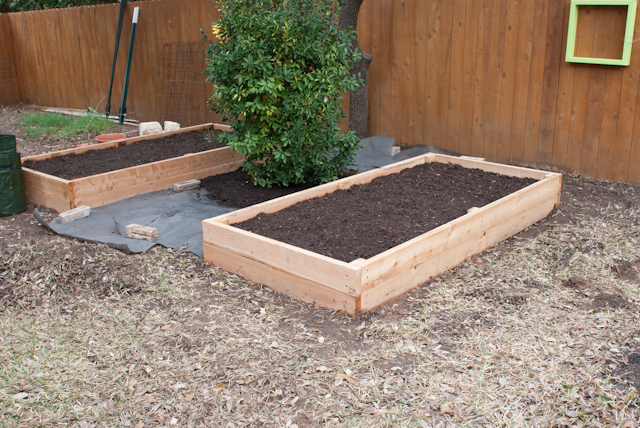
After digging six shallow post holes for each bed, we set the beds in place and then began to level the areas. This part of the process takes the longest…probably because I’m a bit particular about my beds being level. I’m trying something different with my bed soil this time – it’s a tip I heard on the Natural Gardener radio show on Saturday mornings. The tip was to place a good bit of fertilizer about four inches below where you transplant vegetable plants. The idea being that when the roots take hold and then begin growing downward, they will hit the fertilizer and the plant will have a nice growth spurt. So, I filled the bottom three inches of the beds with horse manure and the rest with a combination of organic garden soil and compost. We’ll see what happens and I’ll post results.
Here are our finished beds. (Along with a pile of grass sod I still have to sift.)
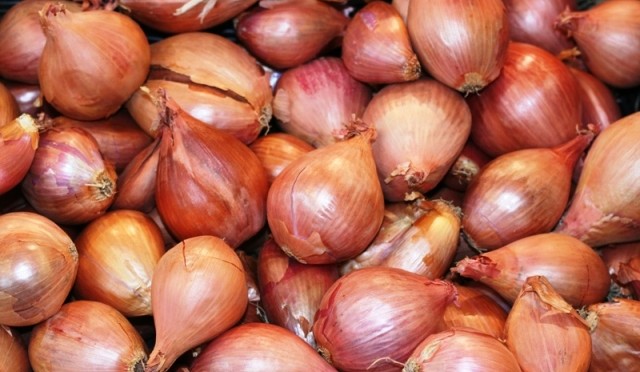
If you haven’t done so already, you can plant chive, green onions, onions,leeks, and shallots for the next week or so. Sow seeds indoors or under cover outdoors for chives, leeks and green onions. Sink bulbs outdoors for shallots and bulb onion.
This is for southern gardens only with a frost line around zone 8 or 9.