Category Archives: Building Garden Accessories

Building a Raised Bed

Raised bed gardens are gaining momentum with urban gardeners everywhere because of the advantages they bring. I began building raised beds for my garden two years ago and started with 6″ depths. After the first two growing seasons, I realized I would have to increase that depth, simply because of the soil composition here in south central Texas.

For those of you curious about the advantages of raised bed gardens, here are a few:

  • Good drainage – excess moisture is pulled away very efficiently.
  • Raised bed gardens have less issue with soil compaction.  Since raised beds are generally built so plants can be accessed without stepping on the soil, compaction is virtually eliminated.  Roots need air and soil compaction hinders this.
  • Seeds can be planted closer together.  Because of the reduced soil compaction, more plants can occupy the same area.
  • Raised bed garden soil warms up quicker during the spring, enabling earlier planting.
  • Raised bed gardens are pleasing to they eye because they can be built and arranged to create pathways and sitting areas.
  • Soil health can be more closely monitored and controlled. You can customize your soil composition based on raised bed, thereby creating optimized environments for each plant family or preference.

This year, I have made a goal for myself to eliminate as much of my back yard as possible. Why? Well, because I live in central Texas, and I would rather create a drought-resistant environment and water my food and the area wildlife, instead of a lawn.

So, we have put in a water garden, not only to create a pleasant place for us, but to create a nice habitat for birds and other creatures. They need water too! We are also filling up what is left of my back yard with plants and flowers which provide leaves for butterfly worms to eat and pupate upon and to provide seeds naturally for the birds which frequent our place. (We have bird feeders as well, but want to supplement them.)

Recently, I decided to change up how my raised beds would be constructed, starting with two new beds which would collectively eliminate approximately 180 square feet of lawn and provide 64 square feet of new garden space at a depth of 10″. I always try to leave space for wheelbarrows and such as I do a lot of hauling around my beds, continually trying to improve the soil quality.

This time, I used four 2″x6″x12′ rough cedar planks and an 8′ cedar 2″x4″. Each 12′ plank was cut into 8′ and 4′ sections, while the 2″x4″ was cut into six 16″ sections. When finished, there were 4″ posts jutting from the bottom of the raised bed frame, used for holding the bed in place.

I used 3 1/2″ decking screws to attach two 8′ sections to three 16″ posts – even on one side and keeping the second plank section flush with the first. (See below)

Raised Bed Side Panels

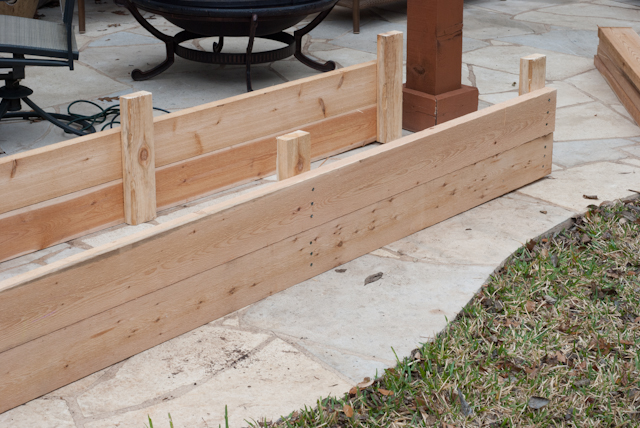
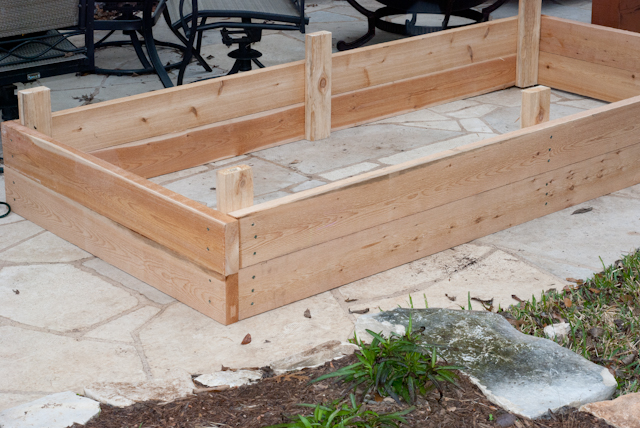
Once both 8′ sides were completed, I attached the 4′ sections to the ends, creating a nice rectangular box. It’s far easier to assembling these pieces with the frame upside down, allowing the tops to be flush. Here is the newly constructed bed.

Raised Bed Construction Complete

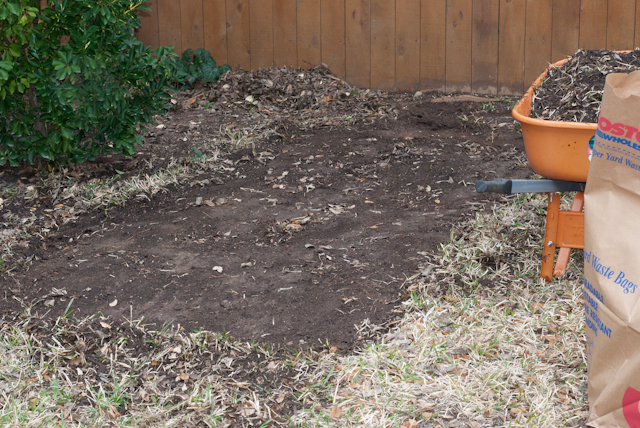
I had moistened the area of the yard I was going to clear and scraped all the sod away from the sections I was going to use as beds. Also, I always keep any sod I scrape up and then use my home-made compost sifter to separate good soil from the grass runners and roots.

Raised Bed Garden Base

After digging six shallow post holes for each bed, we set the beds in place and then began to level the areas. This part of the process takes the longest…probably because I’m a bit particular about my beds being level. I’m trying something different with my bed soil this time – it’s a tip I heard on the Natural Gardener radio show on Saturday mornings. The tip was to place a good bit of fertilizer about four inches below where you transplant vegetable plants. The idea being that when the roots take hold and then begin growing downward, they will hit the fertilizer and the plant will have a nice growth spurt. So, I filled the bottom three inches of the beds with horse manure and the rest with a combination of organic garden soil and compost. We’ll see what happens and I’ll post results.

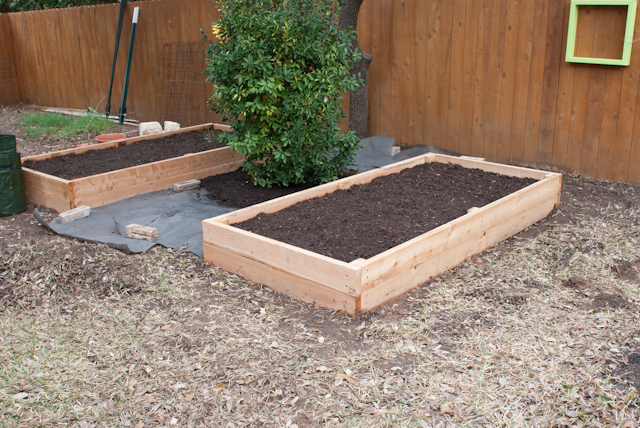
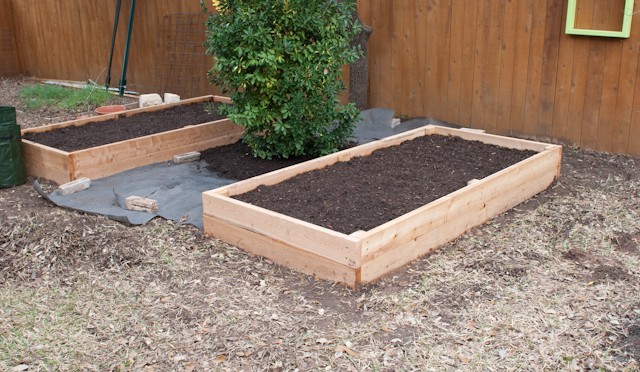
Here are our finished beds. (Along with a pile of grass sod I still have to sift.)

Completed Raised Bed Gardens

Fun Backyard Project

So, first, I have to admit, I’m one of those home improvement show junkies. If I see something in the cable guide that sounds like a really neat home improvement description, I’ll watch it. My favorite shows are Yard Crashers and Bath Crashers. If just find it fascinating what they can do with some of these projects.

Needless to say, this project was on Yard Crashers.

We replaced our privacy fence about a year ago, when we had our slate walkways put in. The fence we had before was falling apart and, for the most part, rotting. It had to be done. Ol’ Yeller is our yard improvement company of choice most of the time, so we called up Seth and they got the job done nicely.

Unfortunately for me, privacy fences have always seemed bland and boring. After seeing one of the Yard Crashers episodes, I decided to build some small plant shadow boxes to hang on the fence.

Here’s our boring fence before:

Fence Project Before

The project consist of constructing boxes of whatever size you want, (we chose 1.5′ sized boxes), mitering the corners, putting them together and then painting them the color of your choice. We wanted a nice contrast so chose lettuce green for the paint. Standard high-quality 2X4 studs were used for the boxes. Nothing fancy needed.

Putting the boxes together was pretty easy, with the help of our friend Dan, who lent his feet to hold everything still while I nailed the corners together. I should probably invest in some clamps so I don’t have to wait on projects until he happens to be in town. It took a few coats of paint and a few days of drying until they were ready to hang.

Fence Project After

A trip to Lowe’s for some mini-planters, a couple decking screws to hold them up and we were good to go. This is a really fun and easy project to spruce up any boring privacy fence!

Pathways are complete

Last night (Friday), my neighbor was getting ready to pull out of his driveway and told me he was getting a large pickup on Saturday to pick up some granite for his side walkway. He asked if I wanted to grab some for my garden as well – of course I said yes. (Saved me about $70 bucks in delivery fees.)

My wife and I had gotten out early and finished up the barrier cloth and some moving around of some items before it was time to pick up the crushed granite. You can see below what the pathways looked like before the rock – this was with partial barrier down.

Pathways Before

So, we went down to Whittlesey Landscape Supplies (http://www.989rock.com/) – my favorite place for bulk supplies – and picked up half a yard for him. After we came back and unloaded it, we went back and picked up two yards for me and unloaded it in our driveway. We spent about three hours moving it to the back and spreading it evenly around. (There are still a couple of piles in certain areas as we have some things to move out of the way.)

Pretty satisfied with the results – see below.

Pathways After

Irrigation is Complete!

This weekend’s agenda was to complete the irrigation and test for leaks. Friday evening, I spent drilling the hose pathways through the boxes and managed to complete them all while I still had some light left. Saturday morning, we started pretty early, putting together the remainder of the connector segments so that we could assemble everything pretty quickly.

Once those segments were installed, the home stretch was merely measuring and running the drip lines, which went very fast. Here is a picture of the northern three beds of our garden with the irrigation in place.

North section of irrigation

After finishing the drip lines, we attached the hose line adapter, hooked up the pressure regulator and then flushed the lines. Then, we capped the ends and turned that sucker on. We only found two leaks, one due to a badly seated section and the other due to a split “L” connector. Luckily, I had some duct tape handy – have I ever told you that duct tape can fix anything? Anyhow, the split “L” will be replaced next weekend and the duct tape will hold the leak for the time being.

Was a productive weekend!

Build a Pole Bean Tower

Pole Bean Bed

Considering my pole bean sprouts are going to be transplanted into larger pots this weekend, I decided it would be a good idea to prepare the bed and build a pole bean tower. So, I turned the soil in the bed and made a trip to Home Depot to buy some long stakes. (Notice the happy lettuce sprouts growing on both sides of the pole bean bed!)

Six Foot Gardening Stakes

I chose to purchase six foot stakes to build a tower approximately five feet tall when complete. The stakes are metal inside, coated with a plastic coating to keep it from rusting – very handy. Here is the link for them:  http://tinyurl.com/7rhbzvj

I anchored each stake in the bed and angled them toward the center, where I tied them together. After evenly spacing the number I wanted to build, I tied a stabilizer across the top of the whole structure to make it sturdier – especially when it will have to bear the weight of multiple bean plants climbing all over it.

NOTE ***  DO NOT build one of these with a mesh. A mesh tower has a tendency to cause the plants to tie down and strangle each other…. not what you want.

Here is the result of today’s task. Very FUN!!!

Pole Bean Towers


Indoor Growing Area


Grow Lights

In the event that other wish to start some seedlings indoors and would like to see an example of how easy this can be, I thought I would take a picture of my indoor growing area.

This area is the underneath portion of my workbench in the garage and measures approximately 4’x2′. I’ve place four 1″x2″ planks across the bottom frame and it provides ample support for four well-watered growing trays. I purchased two 48″ utility lights from Lowe’s – Item #: 245536 |  Model #: NXU-6000 – and two packs of bulbs for approximately $35. The hang chains are included.

Total installation time was about 20 minutes for happy growing seedlings!