Pathways are complete

Last night (Friday), my neighbor was getting ready to pull out of his driveway and told me he was getting a large pickup on Saturday to pick up some granite for his side walkway. He asked if I wanted to grab some for my garden as well – of course I said yes. (Saved me about $70 bucks in delivery fees.)

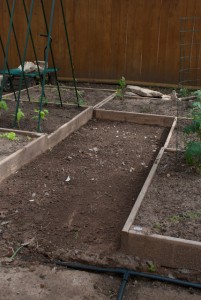
My wife and I had gotten out early and finished up the barrier cloth and some moving around of some items before it was time to pick up the crushed granite. You can see below what the pathways looked like before the rock – this was with partial barrier down.

Pathways Before

So, we went down to Whittlesey Landscape Supplies (http://www.989rock.com/) – my favorite place for bulk supplies – and picked up half a yard for him. After we came back and unloaded it, we went back and picked up two yards for me and unloaded it in our driveway. We spent about three hours moving it to the back and spreading it evenly around. (There are still a couple of piles in certain areas as we have some things to move out of the way.)

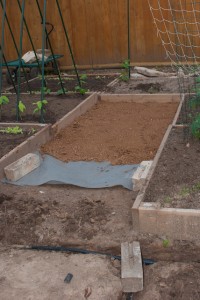
Pretty satisfied with the results – see below.
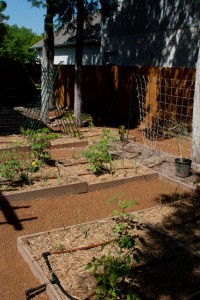
Pathways After

Irrigation is Complete!

This weekend’s agenda was to complete the irrigation and test for leaks. Friday evening, I spent drilling the hose pathways through the boxes and managed to complete them all while I still had some light left. Saturday morning, we started pretty early, putting together the remainder of the connector segments so that we could assemble everything pretty quickly.

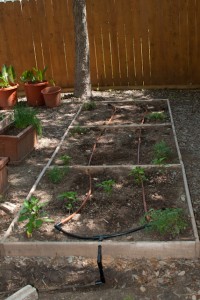
Once those segments were installed, the home stretch was merely measuring and running the drip lines, which went very fast. Here is a picture of the northern three beds of our garden with the irrigation in place.

North section of irrigation

After finishing the drip lines, we attached the hose line adapter, hooked up the pressure regulator and then flushed the lines. Then, we capped the ends and turned that sucker on. We only found two leaks, one due to a badly seated section and the other due to a split “L” connector. Luckily, I had some duct tape handy – have I ever told you that duct tape can fix anything? Anyhow, the split “L” will be replaced next weekend and the duct tape will hold the leak for the time being.

Was a productive weekend!

Garbage Potato Update

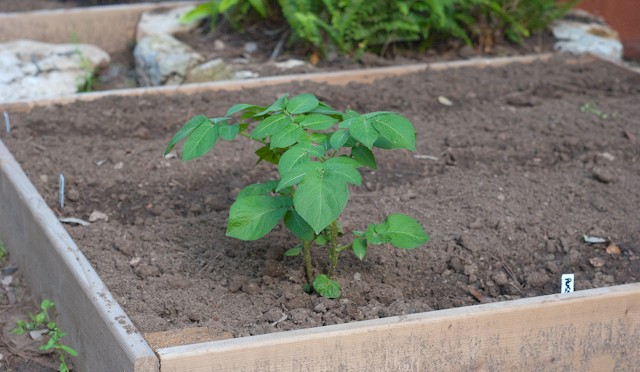
As you may recall, I took two sprouting potatoes from my compost tumbler and stuck them in the ground… just to see what would happen. Well, I’m happy to report that both plants are doing quite well as you can see in the picture below.

I’ll probably do a side dig shortly to see if there is any progress as far as produce. If you’ve never done a side dig before, it is pretty simple, and can be pretty enlightening over time. Just dig gently downward (with your hands) along the side of the plant edges until you come to the bundle. You can just check them out or harvest a few for dinner. When finished, cover the plant back up with dirt and water well.

Pathway Preview

This last weekend, I wanted to lay down a sample pathway so I could visually see what my overall plan would look like when finished. So I chose a small section with which to work. Here is a picture of the section I chose for a mock-up.

Path Before

Above, I’ve already leveled out the ground and raked smooth any chunks and such so I’d have an even space where I could lay down the barrier cloth. My path cover of choice is decomposed granite, which I plan to buy from a local supplier named Whittlesey Landscape Supplies. http://www.989rock.com/ They have some decent prices, great customer service and their deliveries always seems to be on time – makes scheduling a job very handy. If you have a truck you don’t mind getting dirty or scratching the bed (isn’t that what a truck is for?), they’ll also load you up right there.

Anyhow, here is the result of my small sample – this is pretty much what I envisioned when I layed down the plans last year.

Path After

Cheers!

Happy Pole Beans!

Just a short update on my pole bean tower and the beans I have transplanted to their new home.

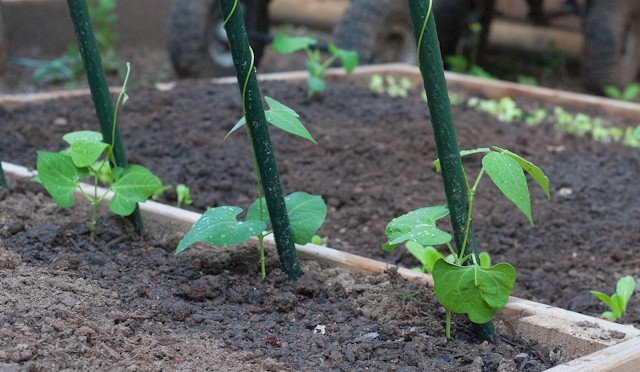
As you can see here, I have very happy pole beans.

I’ve transplanted three on one side and six on the other. Three of the bean plants were not yet ready to be moved, so I’m letting them grow some. Within a few minutes of placing them next to the poles they were climbing away. Within a couple days they were wrapping and growing to what you see here.

This photo was taken yesterday and unfortunately, we had a heavy rain storm mixed with some light hail last night. The second bean plant had its wrapper stem broken, so it will have to self-repair over time. *sad face*

On an up note, I did move the other three bean plants into larger pots to encourage their growth and hope to transplant them next weekend.

Cheers!

Congratulations! It’s worms!

About six months ago, I set up two composting tumblers, one which I populated with red wrigglers and one which I did not. I was experimenting to see if the stories were true about worms eating up your garbage and producing “black gold” for your garden. Needless to say, I put equal amounts of green and brown materials in each. (It wouldn’t be a proper experiment without consistency between control groups, now would it?) And finally, I put my newly purchased red wrigglers into one tumbler.

Over time, I was pleasantly surprised to watch my “reddies” reduce my garbage, clippings and leaves into some nicely smelling, nom nom garden food. They consistently grew in size so I figured I was feeding them appropriately. And, I’ve continued to leave the one tumbler without worms just to see how slowly the process works – it’s slow.

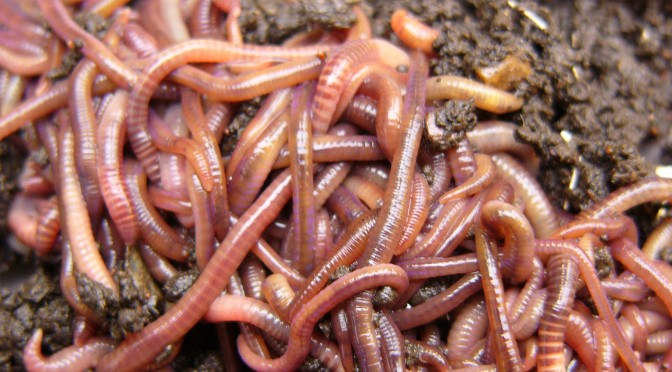
Anyhow, a couple weeks ago, I was turning both composters and then checked in on my “reddies” to see how they were doing. As is normal for me, I reached down for a handful of nom nom goodness for a quick see and smell. (There is nothing like the smell of really healthy compost – after it’s done of course…) When I began breaking apart the clumps, lo and behold, I discovered I was a daddy! I could not count how many little “reddies” were in my hand there were so many.

I kept digging through various parts of my tumbler, only to find more and more baby worms. I’ve read that red wrigglers were prolific breeders, but I wouldn’t have imagined I would have gotten this many out of the single pound of worms I purchased. I highly recommend getting some for your compost pile!

Because I have so many worms now, and since I have observed the effects of composting without them eating away, I’ve moved several batches of them into my other tumbler and loaded it up appropriately to hopefully duplicate my fortune. FUN!

Perfect day to transplant

After a solid two days of slow, steady rain, we finally received a day of sun. The soil in my garden is completely saturated and my rain barrels are full again. (I’m kicking my self for not yet acting upon my cascading rain barrel plan…. I’d have five full barrels if I had…. *kicks self again*)

So, I figured it would be a good day to transplant – and I was right. The soil was VERY easy to dig and mix in nom nom soil goodness with what I already had. Now, six of my fifteen beds are completely planted. Completed beds include five beds of tomatoes, garlic, carrots and basil; and one bed of strawberries and lemon thyme. (The thyme is absolutely HUGE.)

Also transplanted one of my pole bean plants today – it was started to tie into my grow lights so I figured it was time to get it outside. Into bigger pots went bells, jalepenos, and ancho peppers, some beefsteak tomoatoes, and finally cucumbers.

Next week’s transplant plans are to move the rest of the pole beans and the cucumbers into their respective beds and possibly transplant my chives and oregano to where they should be. (They are currently in windows boxes which I’m going to give away)

Enjoy your week!

Build a Pole Bean Tower

Pole Bean Bed

Considering my pole bean sprouts are going to be transplanted into larger pots this weekend, I decided it would be a good idea to prepare the bed and build a pole bean tower. So, I turned the soil in the bed and made a trip to Home Depot to buy some long stakes. (Notice the happy lettuce sprouts growing on both sides of the pole bean bed!)

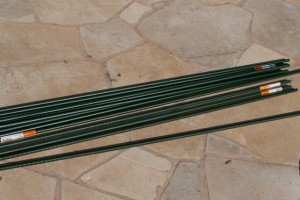
Six Foot Gardening Stakes

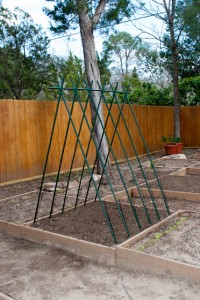
I chose to purchase six foot stakes to build a tower approximately five feet tall when complete. The stakes are metal inside, coated with a plastic coating to keep it from rusting – very handy. Here is the link for them:  http://tinyurl.com/7rhbzvj

I anchored each stake in the bed and angled them toward the center, where I tied them together. After evenly spacing the number I wanted to build, I tied a stabilizer across the top of the whole structure to make it sturdier – especially when it will have to bear the weight of multiple bean plants climbing all over it.

NOTE ***  DO NOT build one of these with a mesh. A mesh tower has a tendency to cause the plants to tie down and strangle each other…. not what you want.

Here is the result of today’s task. Very FUN!!!

Pole Bean Towers


Garden Planning

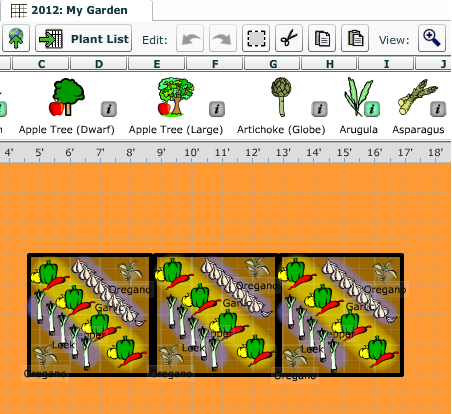
Garden Planner Snip

One of the more important aspects of gardening (in my opinion), is the planning phase. What are you going to plant? How are you going to line everything up? What is the right rotation? When do I plant and how? Many people love the idea of gardening, but because they don’t spend the proper time planning, get discouraged because their plants do not do as well as they saw “in the picture.”

Enter the Territorial Seed Company and their Garden Planter web application. Am I selling something? No. Do I think you should subscribe to it? Yes.

I was able to layout my entire plan in little under a day and then was pleasantly suprised that I was also provided with a seasonal planting guide based on my zip code. You can also get a 30-day trial for the app.

Here are a few of the features:
– drag and drop or drag and drag virtual planting
– automatic plant spacing calculations
– seeding, transplant and harvest guides
– links to purchase seeds right from your guide
– printable documents

Go out and give it a try: (follow the link below and click on the “start Garden Planner” button)

http://gardenplanner.territorialseed.com/

Enjoy!